Linux (centos7)下超详细搭建Redis集群
本篇redis集群搭建博客是基于redis单节点安装完成后的,如未安装单节点小伙伴可参考这篇博客:https://blog.csdn.net/weixin_44422604/article/details/106876756
一、redis集群( 缓存集群 )搭建
1.原来已经安装好了node1上的redis,现在先停止node1的redis服务,准备配置成集群的环境(三主三从架构,我是四个节点搭建redis伪分布式集群)。
命令:service redisd stop
查看redis进程,确认其关闭,命令:ps aux|grep redisd

2.分别在其他节点上安装redis,为了方便操作,建议(本篇博客采用第一种方式)
(1)使用 xshell中的命令发送功能,一次性将操作命令发到 各个终端
(2)使用脚本完成操作,最好能书写自动脚本来完成安装与配置
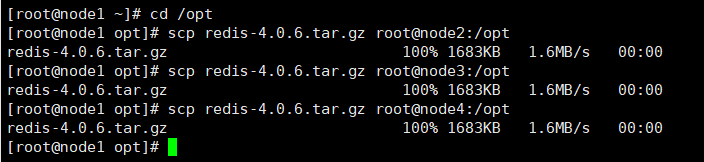
3.从安装好redis的节点中将前面下载的 redis-4.0.6.tar.gz 上传到node2,3,4节点的 /opt 目录下
先进入opt目录,命令:cd /opt
命令:scp redis-4.0.6.tar.gz root@node2:/opt
命令:scp redis-4.0.6.tar.gz root@node3:/opt
命令:scp redis-4.0.6.tar.gz root@node4:/opt
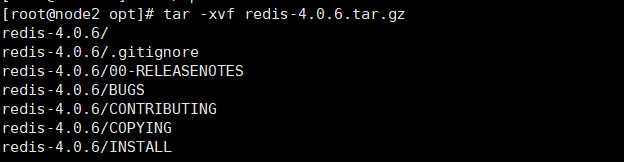
4.到各节点/opt 目录下解压压缩包
命令:tar -xvf redis-4.0.6.tar.gz
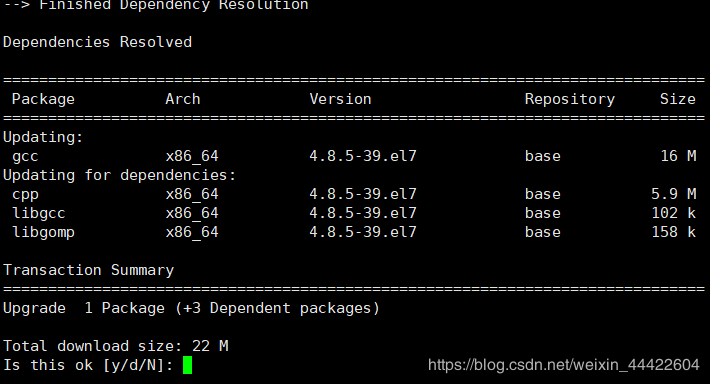
5.到各节点下,使用yum安装gcc依赖,对redis源码进行编译打包
命令: yum install gcc
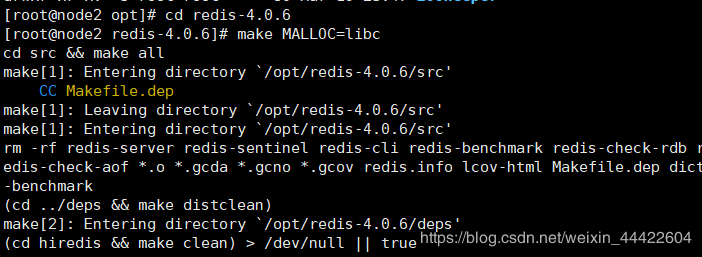
6.进入各节点redis安装目录, 进行编译安装
进入命令:cd /opt/redis-4.0.6
编译安装命令:make MALLOC=libc
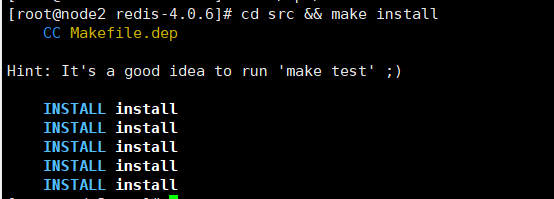
7.将各节点/opt/redis-4.0.6/src目录下的文件加到/usr/local/bin目录
命令:cd src && make install
二.以后台进程方式启动redis
1.修改redis.conf文件( 包括之前安装好redis的节点也检查一下,前面我们没有开启集群,aof日志. )
进入redis的安装目录,编辑redis.conf文件
命令:vi redis.conf
注意修改下列值
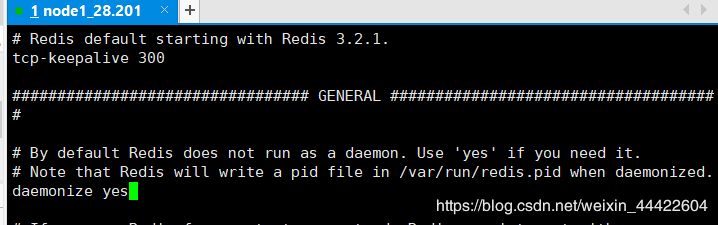
(1)daemonize no改为yes,作用:设置为后台进程
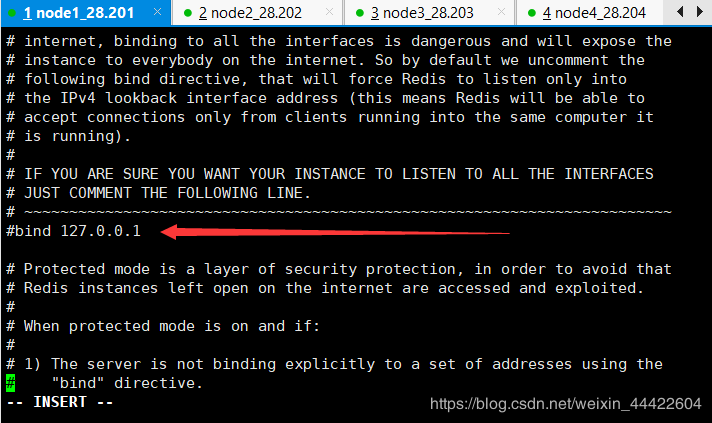
(2)注释 #bind 127.0.0.1 ,作用:开放外网访问,注意以后上线要求这里绑定固定地址
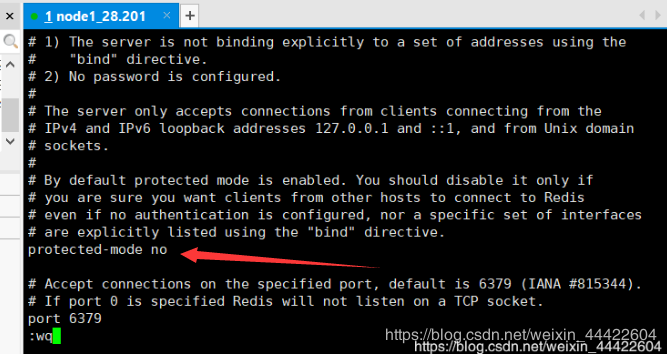
(3)protected-mode no ,作用:将远程保护模式关闭,改为no
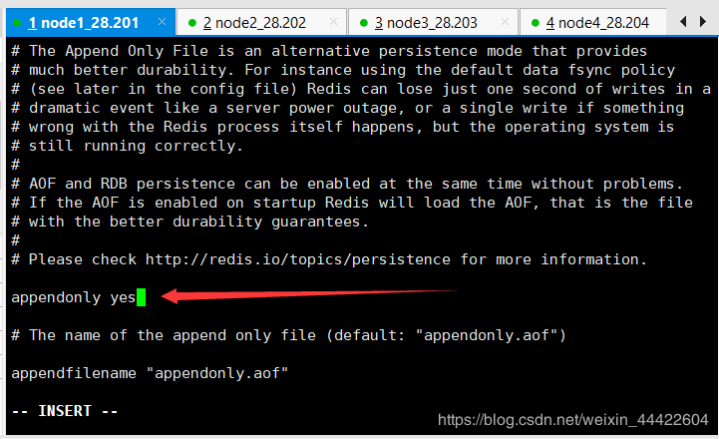
(4)appendonly yes,作用:开启aof日志,它会每次写操作都记录一条日志
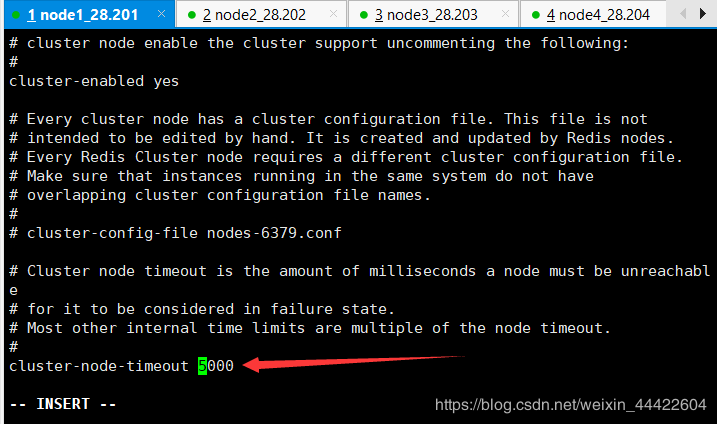
(5)cluster-enabled yes ,作用:#开启集群把注释去掉

(6)cluster-node-timeout 5000,作用:集群节点联接起时时间
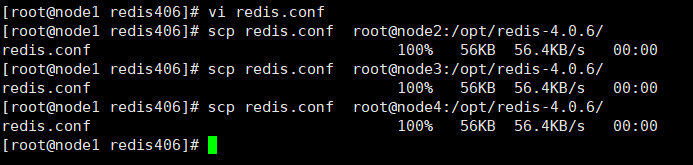
2.修改其中一个节点的配置后,发送至其他各个节点覆盖
命令:scp redis.conf root@node2:/opt/redis-4.0.6/
命令:scp redis.conf root@node3:/opt/redis-4.0.6/
命令:scp redis.conf root@node4:/opt/redis-4.0.6/
3.将各节点redis注册成redisd的一个服务,并设置成开机自启动
(1)进入各节点etc目录,新建redis目录
命令:cd /etc
命令:mkdir redis

(2)将各节点/opt/redis-4.0.6/redis.conf 文件复制一份到/etc/redis目录下,并命名为6379.conf
命令:cp /opt/redis-4.0.6/redis.conf /etc/redis/6379.conf
(3)将各节点redis的启动脚本复制一份放到/etc/init.d目录下
命令:cp /opt/redis-4.0.6/utils/redis_init_script /etc/init.d/redisd

(4)设置各节点redis开机自启动,先切换到/etc/init.d目录下, 执行自启命令
进入命令:cd /etc/init.d
自启命令:chkconfig redisd on

提示:遇到错误: service redisd does not support chkconfig
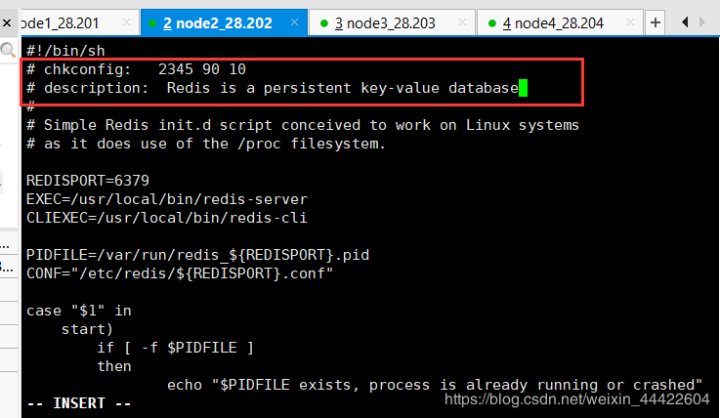
解决方法:使用vi编辑redisd文件,在第一行下面加入如下两行注释,保存退出。
作用: redis服务必须在运行级2,3,4,5下被启动或关闭,启动的优先级是90,关闭的优先级是10。
# chkconfig:23459010 # description: Redis is a persistent key-value database
(5)再次在各节点上执行开机自启命令,成功
命令:chkconfig redisd on

(6)现在可以对四个节点都做一下测试,看 redisd 是否可以正常启动和停止,客户端是否可以登录
redis启动命令:service redisd start

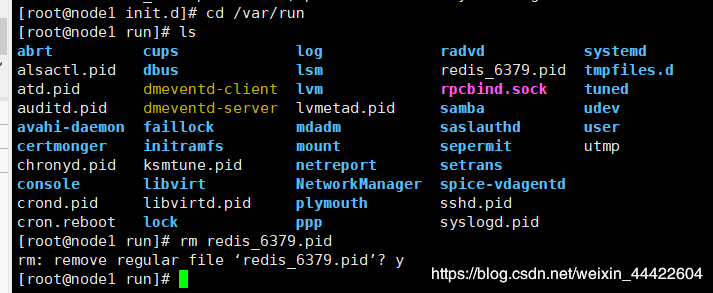
提示:这表示redis服务原来非法的关闭了,但没有删除 pid文件,这导致不能启动
解决方法:进入 var/run的目录下,删掉redis_6379.pid文件
进入命令:cd var/run
删除命令:rm redis_6379.pid
(7)再次使用redis启动命令,即可正常启动:service redisd start

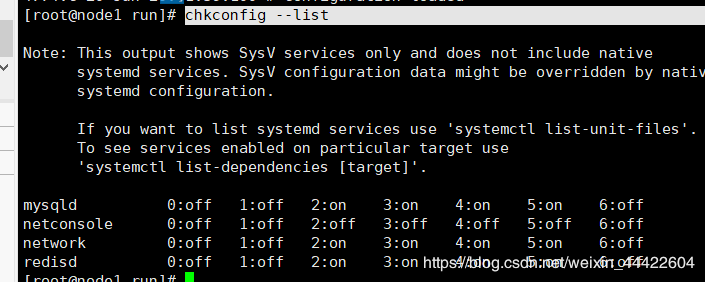
(8)使用命令:chkconfig --list
可查看开机自启动服务
(9)搭建集群前,使用客户端关闭各节点redis服务
命令: redis-cli SHUTDOWN
(10)使用查看进程命令,确认redis-server服务关闭。
命令:ps aux|grep redis

三. 配置集群( 以下操作只需要在一台机器上安装即可,这里我选用 node2 上安装 )
1.在 redis安装目录的 src 目录下有一个文件: redis-trib.rb
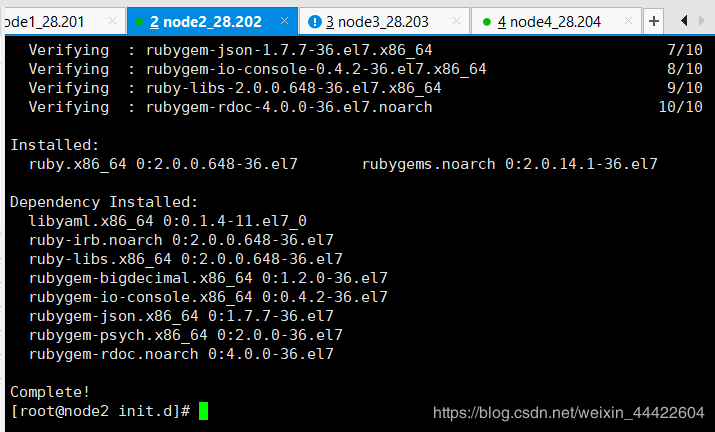
这是一个ruby版的 redis服务安装脚本,为了使用它,请首先安装 ruby. 安装ruby和ruby gem工具(redis3集群配置需要ruby的gem工具,类似yum)
安装命令:yum -y install ruby rubygems
2. 使用gem下载redis集群的配置脚本
命令:gem install redis

(1)错误: 没有反应,访问不到 gem的源
解决方案: 使用淘宝的一个镜像就可以安装redis了
命令:gem sources -a https://ruby.taobao.org/
(2)这时,又出现了第二个错误:
Fetching: redis-4.2.1.gem (100%),ERROR: Error installing redis:
redis requires Ruby version >= 2.3.0.
错误分析: ruby的版本太低了,要求 2.3以上,当前用命令查一下ruby 的版本
命令:ruby --version

(3)解决方案: 升级ruby
3. 升级ruby版本
(1)更新一下curl命令的协议版本
命令:yum update -y nss curl libcurl
命令:sudo yum update nss nss-util nss-sysinit nss-tools
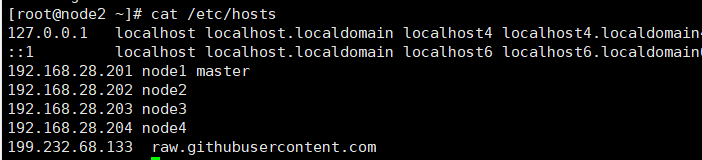
(2)修改hosts文件, 加上美国的ip和raw.githubusercontent.com
命令:vi /etc/hosts
在hosts文件中加入:199.232.68.133 raw.githubusercontent.com
(3)安装RAM: RAM(Ruby Version Manager )是一款RAM的命令行工具,可以使用RAM轻松安装,管理Ruby版本。RVM包含了Ruby的版本管理和Gem库管理(gemset)
命令:gpg --keyserver hkp://keys.gnupg.net --recv-keys 409B6B1796C275462A1703113804BB82D39DC0E3 7D2BAF1CF37B13E2069D6956105BD0E739499BDB
命令:curl -sSL https://get.rvm.io | bash -s stable
(4)如若第三步遇到错误,请编辑一下以下脚本文件abc.sh 保存到 ~ 目录
进入命令:cd ~
编辑命令:vi abc.sh
复制下面的脚本粘贴保存
#!/usr/bin/env bash
shopt -s extglob
set -o errtrace
set -o errexit
set -o pipefail rvm_install_initialize{ DEFAULT_SOURCES=(github.com/rvm/rvm bitbucket.org/mpapis/rvm) BASH_MIN_VERSION="3.2.25"if[[-n "${BASH_VERSION:-}"&&"$(\printf "%b" "${BASH_VERSION:-}\n${BASH_MIN_VERSION}\n" | LC_ALL=C \sort -t"." -k1,1n -k2,2n -k3,3n | \head -n1)"!="${BASH_MIN_VERSION}"]] then
echo "BASH ${BASH_MIN_VERSION} required (you have $BASH_VERSION)" exit 1 fi
export HOME PS4
export rvm_trace_flag rvm_debug_flag rvm_user_install_flag rvm_ignore_rvmrc rvm_prefix rvm_path
PS4="+ \${BASH_SOURCE##\${rvm_path:-}} : \${FUNCNAME[0]:+\${FUNCNAME[0]}} \${LINENO} > "}log{ printf "%b\n""$*";}debug{[[ ${rvm_debug_flag:-0}-eq 0]]|| printf "%b\n""$*" >&2;}warn{ log "WARN: $*" >&2;}fail{ fail_with_code 1"$*";}fail_with_code{ code="$1"; shift ; log "\nERROR: $*\n" >&2; exit "$code";}rvm_install_commands_setup{ \which which >/dev/null 2 >&1|| fail "Could not find 'which' command, make sure it's available first before continuing installation." \which grep >/dev/null 2 >&1|| fail "Could not find 'grep' command, make sure it's available first before continuing installation."if[[-z "${rvm_tar_command:-}"]]&& builtin command -v gtar >/dev/null
then
rvm_tar_command=gtar
elif
${rvm_tar_command:-tar}--help 2 >&1| GREP_OPTIONS="" \grep ----strip-components >/dev/null
then
rvm_tar_command="${rvm_tar_command:-tar}"elsecase"$(uname)" in (OpenBSD) log "Trying to install GNU version of tar, might require sudo password"if(( UID )) then sudo pkg_add -z gtar-1else pkg_add -z gtar-1 fi
rvm_tar_command=gtar ;;(Darwin|FreeBSD|DragonFly) # it's not possible to autodetect on OSX, the help/man does not mention all flags
rvm_tar_command=tar ;;(SunOS)case"$(uname -r)" in (5.10) log "Trying to install GNU version of tar, might require sudo password"if(( UID )) then if \which sudo >/dev/null 2 >&1 then sudo_10=sudo
elif \which /opt/csw/bin/sudo >/dev/null 2 >&1 then sudo_10=/opt/csw/bin/sudo else fail "sudo is required but not found. You may install sudo from OpenCSW repository (https://www.opencsw.org/about)" fi
pkginfo -q CSWpkgutil || $sudo_10 pkgadd -a $rvm_path/config/solaris/noask -d https://get.opencsw.org/now CSWpkgutil
sudo /opt/csw/bin/pkgutil -iy CSWgtar -t https://mirror.opencsw.org/opencsw/unstable else pkginfo -q CSWpkgutil || pkgadd -a $rvm_path/config/solaris/noask -d https://get.opencsw.org/now CSWpkgutil /opt/csw/bin/pkgutil -iy CSWgtar -t https://mirror.opencsw.org/opencsw/unstable
fi
rvm_tar_command=/opt/csw/bin/gtar ;;(*) rvm_tar_command=tar ;; esac
esac
builtin command -v ${rvm_tar_command:-gtar} >/dev/null || fail "Could not find GNU compatible version of 'tar' command, make sure it's available first before continuing installation." fi if[[" ${rvm_tar_options:-} "!=*" --no-same-owner "*]]&& $rvm_tar_command --help 2 >&1| GREP_OPTIONS="" \grep ----no-same-owner >/dev/null
then
rvm_tar_options="${rvm_tar_options:-}${rvm_tar_options:+ }--no-same-owner" fi }usage{ printf "%b" "
Usage
rvm-installer [options][action] Options [[--]version] The version or tag to install. Valid values are: latest - The latest tagged version. latest-minor - The latest minor version of the current major version. latest-- The latest minor version of version x. latest-.- The latest patch version of version x.y...- Major version x, minor version y and patch z.[--]branch The name of the branch from which RVM is installed. This option can be used
with the following formats for:/ If account is rvm or mpapis, installs from one of the following: https://github.com/rvm/rvm/archive/master.tar.gz
https://bitbucket.org/mpapis/rvm/get/master.tar.gz
Otherwise, installs from: https://github.com//rvm/archive/master.tar.gz / If account is rvm or mpapis, installs from one of the following: https://github.com/rvm/rvm/archive/.tar.gz
https://bitbucket.org/mpapis/rvm/get/.tar.gz
Otherwise, installs from: https://github.com//rvm/archive/.tar.gz [/] Installs the branch from one of the following: https://github.com/rvm/rvm/archive/.tar.gz
https://bitbucket.org/mpapis/rvm/get/.tar.gz [--]source Defines the repository from which RVM is retrieved and installed in the format:// Where:- Is bitbucket.org, github.com or a github enterprise site serving
an RVM repository.- Is the user account in which the RVM repository resides.- Is the name of the RVM repository. Note that when using the [--]source option, one should only use the [/]branch format
with the [--]branch option. Failure to do so will result in undefined behavior.--trace
Provides debug logging for the installation script. Actions
master - Installs RVM from the master branch at rvm/rvm on github or mpapis/rvm
on bitbucket.org. stable - Installs RVM from the stable branch a rvm/rvm on github or mpapis/rvm
on bitbucket.org. help - Displays this output. " } ## duplication marker 32fosjfjsznkjneuera48jae __rvm_curl_output_control{if(( ${rvm_quiet_curl_flag:-0}==1)) then
__flags+=("--silent""--show-error") elif [[" $*"==*" -s"*||" $*"==*" --silent"*]] then
# make sure --show-error is used with --silent [[" $*"==*" -S"*||" $*"==*" -sS"*||" $*"==*" --show-error"*]]||{ __flags+=("--show-error")} fi } ## duplication marker 32fosjfjsznkjneuera48jae
# -S is automatically added to -s __rvm_curl( __rvm_which curl >/dev/null ||{ rvm_error "RVM requires 'curl'. Install 'curl' first and try again."return200} typeset -a __flags
__flags=(--fail --location --max-redirs 10)[["$*"==*"--max-time"*]]||[["$*"==*"--connect-timeout"*]]|| __flags+=(--connect-timeout 30--retry-delay 2--retry 3)if[[-n "${rvm_proxy:-}"]] then __flags+=(--proxy "${rvm_proxy:-}") fi
__rvm_curl_output_control
unset curl
_sources=(${!1}) _pattern=$2for _source in "${_sources[@]}"do IFS='/' read -r _domain _account _repo <<<"${_source}" _version="$( fetch_versions ${_domain} ${_account} ${_repo}| GREP_OPTIONS="" \grep "^${_pattern:-}"| tail -n 1)" if[[-n ${_version}]] then
echo "${_version}"return0 fi
done
fail_with_code 4"Exhausted all sources trying to fetch version '$version' of RVM!"} # Returns a sorted list of most recent tags from a repository fetch_versions{ typeset _account _domain _repo _url
_domain=$1 _account=$2 _repo=$3case ${_domain} in (bitbucket.org) _url="https://api.${_domain}/2.0/repositories/${_account}/${_repo}/refs/tags?sort=-name&pagelen=20";;(github.com) _url=https://api.${_domain}/repos/${_account}/${_repo}/tags ;;(*) _url=https://${_domain}/api/v3/repos/${_account}/${_repo}/tags ;; esac { __rvm_curl -sS "${_url}"|| warn "...the preceeding error with code $? occurred while fetching $_url";}| \awk -v RS=',|values":'-v FS='"''$2=="name"&&$4!="rvm"{print $4}'| sort -t.-k 1,1n -k 2,2n -k 3,3n -k 4,4n -k 5,5n }install_release{ typeset _source _sources _url _version _verify_pgp
_sources=(${!1}) _version=$2 debug "Downloading RVM version ${_version}"for _source in "${_sources[@]}"docase ${_source} in (bitbucket.org*) _url="https://${_source}/get/${_version}.tar.gz" _verify_pgp="https://${_source}/downloads/${_version}.tar.gz.asc";;(*) _url="https://${_source}/archive/${_version}.tar.gz" _verify_pgp="https://${_source}/releases/download/${_version}/${_version}.tar.gz.asc";; esac
get_and_unpack "${_url}""rvm-${_version}.tgz""$_verify_pgp"&&return done return $?}install_head{ typeset _branch _source _sources _url
_sources=(${!1}) _branch=$2 debug "Selected RVM branch ${_branch}"for _source in "${_sources[@]}"docase ${_source} in (bitbucket.org*) _url=https://${_source}/get/${_branch}.tar.gz ;;(*) _url=https://${_source}/archive/${_branch}.tar.gz ;; esac
get_and_unpack "${_url}""rvm-${_branch//\//_}.tgz"&&return done return $?} # duplication marker dfkjdjngdfjngjcszncv
# Drop in cd which _doesn't_ respect cdpath __rvm_cd{ typeset old_cdpath ret
ret=0 old_cdpath="${CDPATH}" CDPATH="." chpwd_functions="" builtin cd "$@"|| ret=$? CDPATH="${old_cdpath}"return $ret }get_package{ typeset _url _file
_url="$1" _file="$2" log "Downloading ${_url}" __rvm_curl -sS ${_url} > ${rvm_archives_path}/${_file}||{ _return=$?case $_return in
# duplication marker lfdgzkngdkjvnfjknkjvcnbjkncvjxbn (60) log "
Could not download '${_url}', you can read more about it here: https://rvm.io/support/fixing-broken-ssl-certificates/ To continue in insecure mode run 'echo insecure >> ~/.curlrc'. " ;; # duplication marker lfdgzkngdkjvnfjknkjvcnbjkncvjxbn (77) log "
It looks like you have old certificates, you can read more about it here: https://rvm.io/support/fixing-broken-ssl-certificates/ " ;; # duplication marker lfdgzkngdkjvnfjknkjvcnbjkncvjxbn (141) log "
Curl returned 141- it is result of a segfault which means it's Curls fault. Try again and if it crashes more than a couple of times you either need to
reinstall Curl or consult with your distribution manual and contact support. " ;;(*) log "
Could not download '${_url}'. curl returned status '$_return'. " ;; esac return $_return }} # duplication marker flnglfdjkngjndkfjhsbdjgfghdsgfklgg rvm_install_gpg_setup{ export rvm_gpg_command { rvm_gpg_command="$( \which gpg2 2>/dev/null )"&&[[ ${rvm_gpg_command}!="/cygdrive/"*]]}||{ rvm_gpg_command="$( \which gpg 2>/dev/null )"&&[[ ${rvm_gpg_command}!="/cygdrive/"*]]}|| rvm_gpg_command="" debug "Detected GPG program: '$rvm_gpg_command'"[[-n "$rvm_gpg_command"]]||return $?} # duplication marker rdjgndfnghdfnhgfdhbghdbfhgbfdhbn verify_package_pgp{if"${rvm_gpg_command}"--verify "$2""$1" then
log "GPG verified '$1'"else typeset _return=$? log "\
GPG signature verification failed for'$1'-'$3'! Try to install GPG v2 and then fetch the public key: ${SUDO_USER:+sudo }${rvm_gpg_command##*/}--keyserver hkp://pool.sks-keyservers.net --recv-keys 409B6B1796C275462A1703113804BB82D39DC0E3 7D2BAF1CF37B13E2069D6956105BD0E739499BDB
or if it fails: command curl -sSL https://rvm.io/mpapis.asc | ${SUDO_USER:+sudo }${rvm_gpg_command##*/}--import- command curl -sSL https://rvm.io/pkuczynski.asc | ${SUDO_USER:+sudo }${rvm_gpg_command##*/}--import- In case of further problems with validation please refer to https://rvm.io/rvm/security
"
_url="$1" _file="$2" _verify_pgp="$3" get_package "$_url""$_file"||return $? verify_pgp "$_verify_pgp""$_file"||return $?[[-d "${rvm_src_path}/rvm"]]|| \mkdir -p "${rvm_src_path}/rvm" __rvm_cd "${rvm_src_path}/rvm"||{ _return=$? log "Could not change directory '${rvm_src_path}/rvm'."return $_return } # Remove existing installation
typeset _cleanup_cmd
_cleanup_cmd="rm -rf ${rvm_src_path}/rvm/{,.[!.],..?}*" $_cleanup_cmd ||{ _return=$? log "Could not remove old RVM sources. Try:\n\n\tsudo $_cleanup_cmd\n\nThen retry your task again."return $_return } # Unpack sources
__rvm_debug_command $rvm_tar_command xzf ${rvm_archives_path}/${_file} ${rvm_tar_options:-}--strip-components 1||{ _return=$? log "Could not extract RVM sources."return $_return }}rvm_install_default_settings{ # Tracing,if asked for.if[["$*"==*--trace*]]||(( ${rvm_trace_flag:-0} >0)) then
set -o xtrace
rvm_trace_flag=1 fi
# Variable initialization, remove trailing slashes if they exist on HOME true \
${rvm_trace_flag:=0} ${rvm_debug_flag:=0}\
${rvm_ignore_rvmrc:=0} HOME="${HOME%%+(\/)}"if(( rvm_ignore_rvmrc ==0)) then for rvmrc in /etc/rvmrc "$HOME/.rvmrc"doif[[-s "$rvmrc"]] then if GREP_OPTIONS="" \grep '^\s*rvm .*$'"$rvmrc" >/dev/null 2 >&1 then
printf "%b" "
Error: $rvmrc is for rvm settings only. rvm CLI may NOT be called from within $rvmrc. Skipping the loading of $rvmrc
"
exit 1else source "$rvmrc" fi
fi
done
fi if[[-z "${rvm_path:-}"]] then if(( UID ==0)) then
rvm_user_install_flag=0 rvm_prefix="/usr/local" rvm_path="${rvm_prefix}/rvm"else rvm_user_install_flag=1 rvm_prefix="$HOME" rvm_path="${rvm_prefix}/.rvm" fi
fi if[[-z "${rvm_prefix}"]] then rvm_prefix=$( dirname $rvm_path ) fi
赋予脚本执行权限命令:chmod +x abc.sh
执行这个脚本命令:./abc.sh
如出现下面这样,说明成功
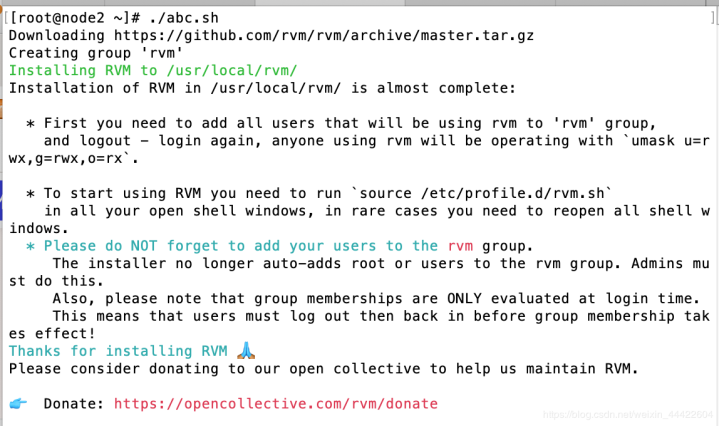
(5)刷新环境变量
命令:source /etc/profile.d/rvm.sh
(6)列出ruby可以安装的版本
命令:rvm list known
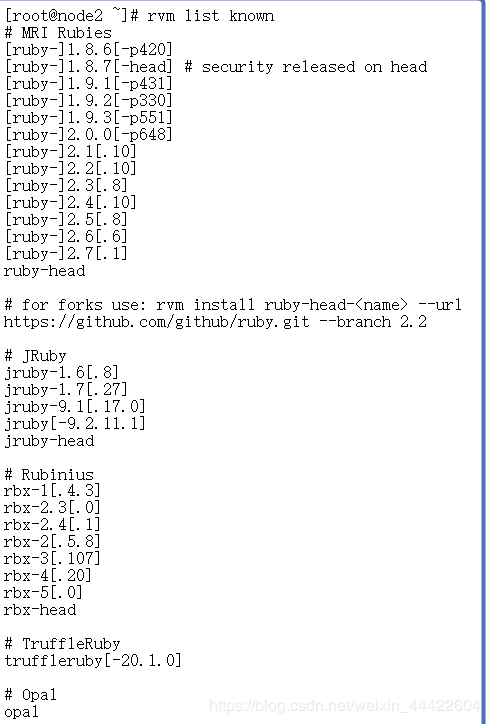
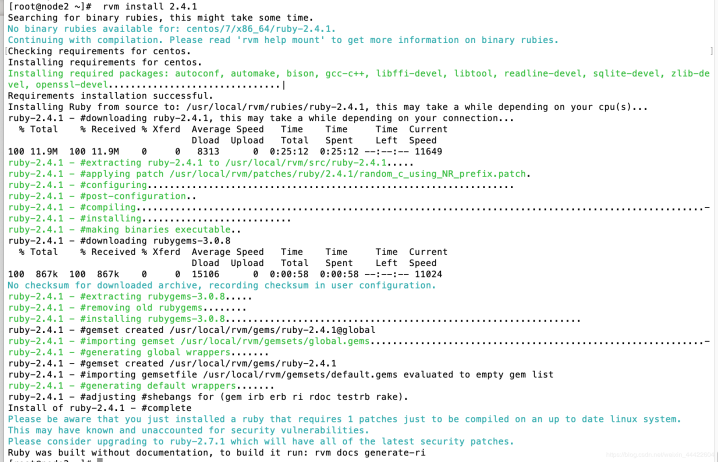
(7)安装Ruby2.4.1版本(这个命令耗时较长,我花了25分钟才下载完毕,建议后台挂着下载即可),过程中下载失败,重新执行命令下载即可
命令:rvm install 2.4.1
(8)使用Ruby2.4.1版本
命令:rvm use 2.4.1
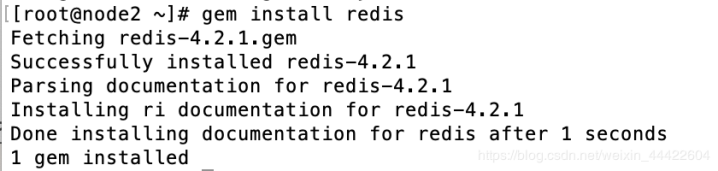
(9)再次安装Redis
命令:gem install redis
四、创建集群
1.由于是四个节点,搭建redis集群最少要6个节点,3主3从架构,所以在node1, node2(根据自己搭建环境来选择,我选的是节点1跟2)上分别增加一个端口
(1)进入 etc/redis 目录,并复制一个配置文件为 6380.conf
命令:cd /etc/redis
命令:cp 6379.conf 6380.conf
(2)修改node1跟node2中etc/redis 目录下 6380.conf的配置中的端口为 6380
命令:vi 6380.conf
(3)在创建集群前,请确保4个节点的redisd 服务都是打开的
命令:service redisd start
(4)另外两个新增的端口须单独启动redis进程
(5)node1上面的redis安装在了 /opt/redis-4.0.6下,所以进入到这个目录的src下执行命令
命令:./redis-server /etc/redis/6380.conf &
(6)node2上面的redis安装在了 /opt/redis-4.0.6下,所以进入到这个目录的src下执行命令
命令:./redis-server /etc/redis/6380.conf &
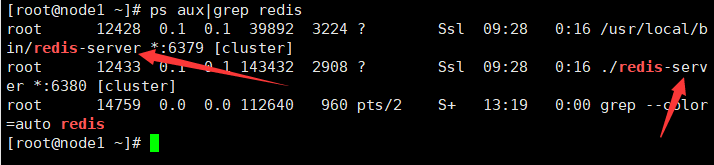
(7)可用查看命令,验证redis服务是否启动,注意:node1跟node2有两个redis才是正确的
命令:ps aux|grep redis
2.进入node2(安装Ruby的节点上)中redis的安装目录下的src文件中
命令:cd /opt/redis-4.0.6/src
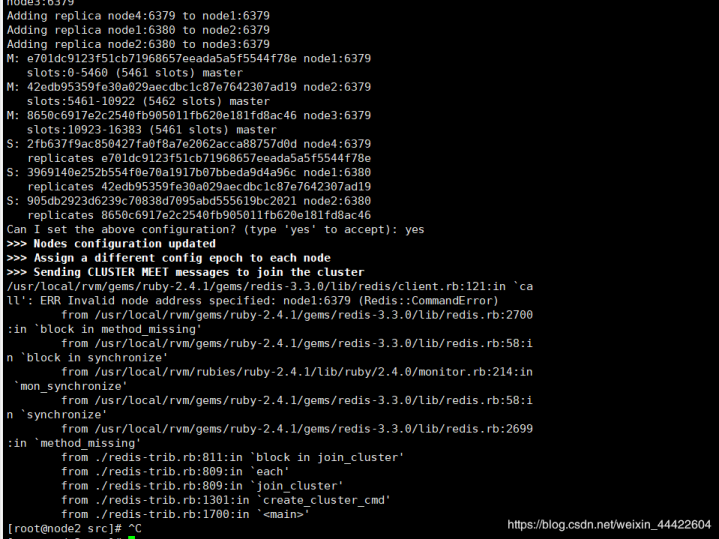
执行创建redis集群的命令(根据自己端口情况设置):./redis-trib.rb create --replicas 1 192.168.28.201:6379 192.168.28.202:6379 192.168.28.203:6379 192.168.28.204:6379 192.168.28.201:6380 192.168.28.202:6380
(1)遇到下图错误可看这篇博客
地址:https://blog.csdn.net/weixin_44422604/article/details/106954890
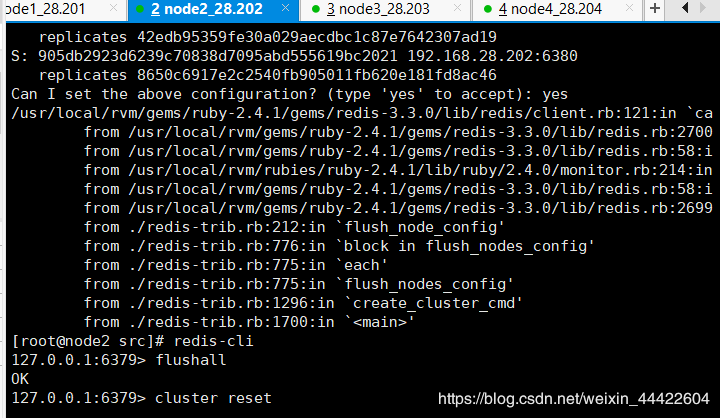
(2)遇到下图错误可看这篇博客
地址:https://blog.csdn.net/weixin_44422604/article/details/106955119
3.以上无误后,使用客户端测试redis集群
命令:redis-cli -c -h 192.168.0.200
注意:后面是自己的节点地址,一定要加 -c 参数,表示集群
可根据下图命令进行测试,观察节点分片是否起作用
[root@node2 src]# redis-cli -c -h 192.168.0.200
192.168.0.200:6379> set a 1
-> Redirected to slot [15495] located at 192.168.0.202:6379
OK 槽 数据保存到 202节点了(分片起作用了)
192.168.0.202:6379> set b 2
-> Redirected to slot [3300] located at 192.168.0.200:6379
OK
192.168.0.200:6379> set c 3
-> Redirected to slot [7365] located at 192.168.0.201:6379
OK
192.168.0.201:6379> set d 4
-> Redirected to slot [11298] located at 192.168.0.202:6379
OK
五、到这里Redis集群搭建就已经完成了,过程中我也踩了很多坑,但只有这样才能不断的学习进步,如果你在搭建过程中也遇到一些问题,也可在下方留言一起交流学习,喜欢就关注我啦。